Welcome to Schedule Manager 101!
Your ultimate resource for mastering the intricacies of the HydroApps Schedule Manager module.
This comprehensive article is designed to equip you with essential tools and expert tips to:
- Seamlessly schedule and effectively communicate with your team members.
- Discover how to lay the groundwork for success by configuring crucial settings, ensuring accurate position assignments, and prioritizing key employees.
- Learn the art of creating schedules with ease using templates and direct shift additions, optimizing staff availability and managing leave requests efficiently.
- Dive into managing shift changes effortlessly, from handling sub requests to editing shifts, utilizing powerful features like announcements and schedule reports to enhance organizational efficiency.
Get ready to unlock the full potential of Schedule Manager and revolutionize your scheduling processes with our expert guidance and insider tips!
Set Yourself Up for Success
Before creating your first schedule, there are a few settings you will want to make sure are correct to make the scheduling process a breeze.
 1. Set up schedule management access for staff who will be managing schedules (i.e. creating schedules, assigning shifts, approving leave requests and shifts trades, etc.)
 1. Set up schedule management access for staff who will be managing schedules (i.e. creating schedules, assigning shifts, approving leave requests and shifts trades, etc.)
- To give a user Schedule Management access go to Admin > Client Setting > User Listing > Find your user and select the “edit” button.
- Select the “Schedule Management” tab.
- Check “Manage Facility Schedules”
- Pro Tip: Only Admin & Facility Manager access levels can Schedule Management privileges.
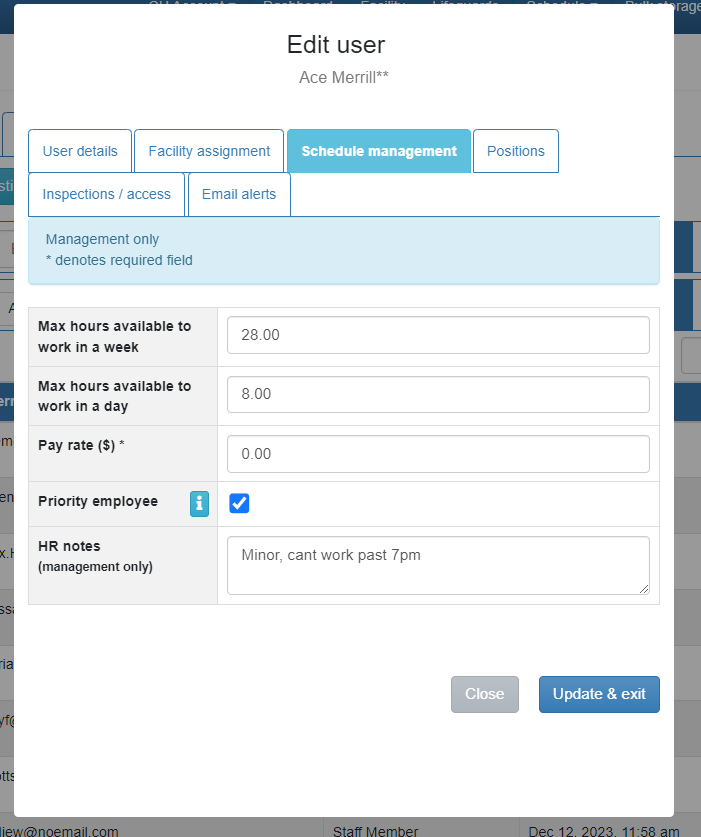
 2. Schedule Manager provides visual alerts for users who are over their max weekly or daily hours. When entering staff, be sure to enter their max hours.
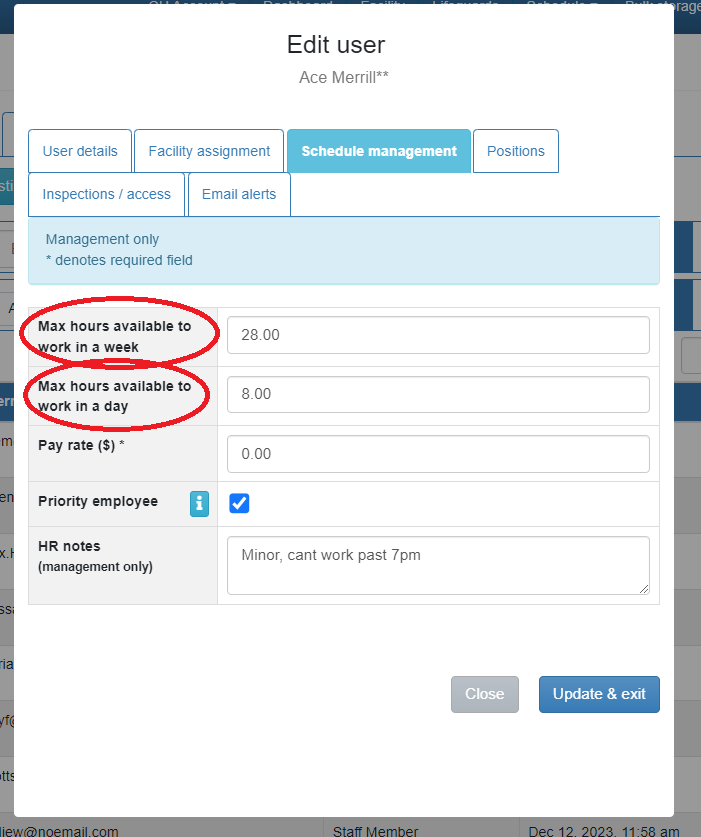 2. Schedule Manager provides visual alerts for users who are over their max weekly or daily hours. When entering staff, be sure to enter their max hours.
- You can enter this information by going to Admin >Client Settings > User Listing > Find your user and select the “edit” button.
- Select the “Schedule Management” tab
- Enter your information in the appropriate fields
- Pro Tip: If you have a large number of staff, the HydroApps team can bulk upload this information for you. Reach out to [email protected] to get assistance.
 3. Ensure you have the correct positions added prior to scheduling.
 3. Ensure you have the correct positions added prior to scheduling.
 - To add positions to a facility, go to Admin > Facility Management
- Find the facility you’d like to add positions to and select the person icon.
- Select the “Add new position” button or edit a current position.
- Enter position information and hit save.
- Pro Tip: The position code is what will appear on your schedule.
- After your facility positions are entered, make sure users have the correct positions assigned to them.
- Pro Tip: See a quick overview of your staff's positions by selecting your name in the top menu bar and then selecting staff listing.
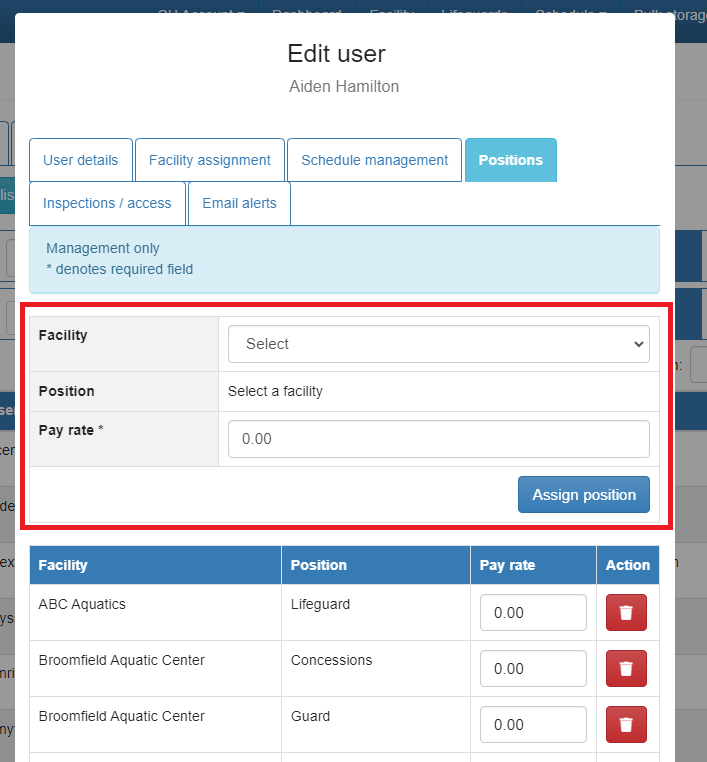
- To assign a staff member a position, find the user under Client Management > User Listing and select the edit button.
- Select the “Positions” tab.
- Select the Facility and Position, then click "Assign Position".
- Pro Tip: Enter the user’s pay rate too if you want the ability to view estimated payroll in your reports.
- Continue to assign any additional positions the employee may have.
- Select “Update & Exit”
 4. Set your “priority” employees.
 4. Set your “priority” employees.
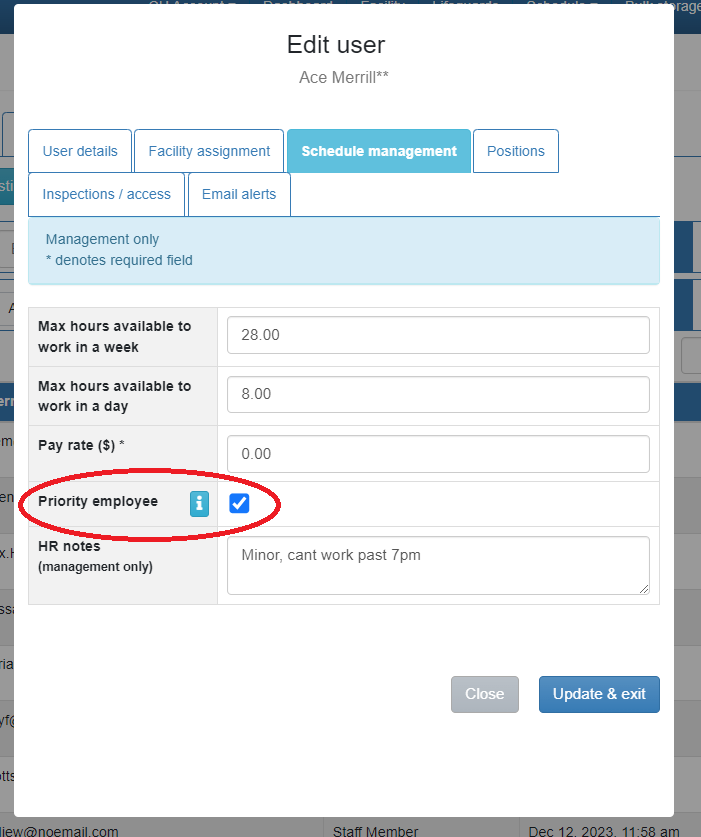
- Employees who are set to “priority” in their user settings will receive top priority for shift preference. Meaning, if you use the “SwiftShift” button, priority employees will be assigned first, followed by non-priority employees.
- Admin and Facility Manager level users can assign this setting to staff by going to Admin > Client Management > User Listing. Find your user and select the edit button. Select “Schedule Management” from the top menu and the check “Priority Employee.”
Creating a Schedule
Schedule Templates
- Schedule templates allow you to easily important shifts into a new schedule. This feature is great for saving time if you have recurring schedules.
- To create a schedule template, select Schedule > Schedule Templates
- Select the facility you are creating the template for from the drop down.
- Select a current template to edit or hit “Create New Template”

- Use the addition button to add shifts to the template. You'll be able to add multiples of the same shift in the next step.
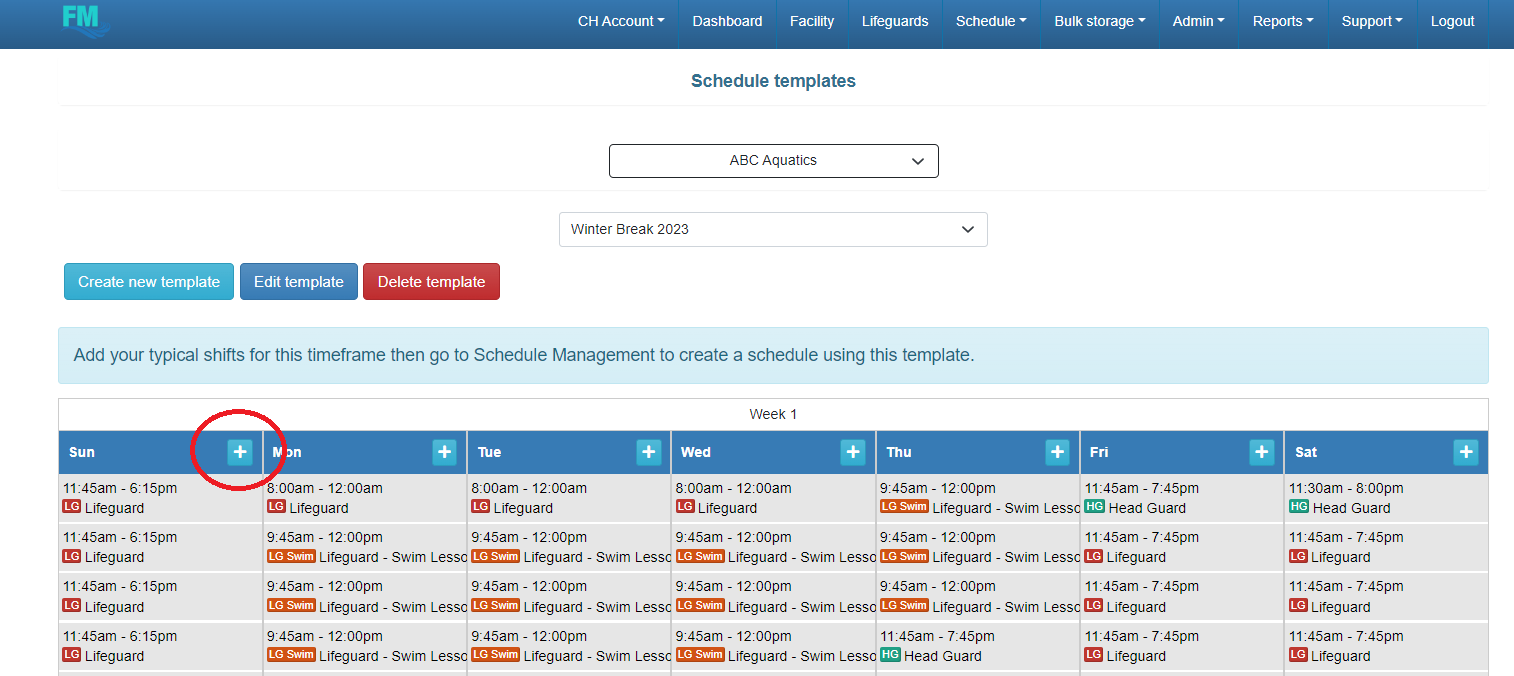
- Pro Tip: Do you have staff members that typically work the same shift? You can go ahead and assign them to shifts inside the template and save yourself a step later on. Simply click on the shift and assign the available staff member from the list below.
Adding shifts directly to a schedule
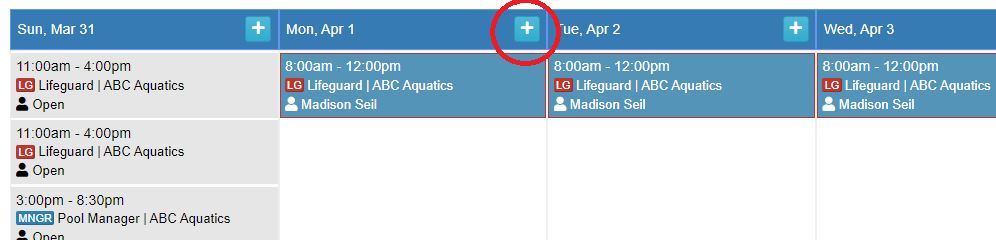
- You do not have to use a schedule template to create a schedule. Go to Schedule > Schedule Management and use the addition sign to add shifts.
- You can add multiple shifts at once and make shifts repeating if desired.
 Assigning Shifts
 Assigning Shifts
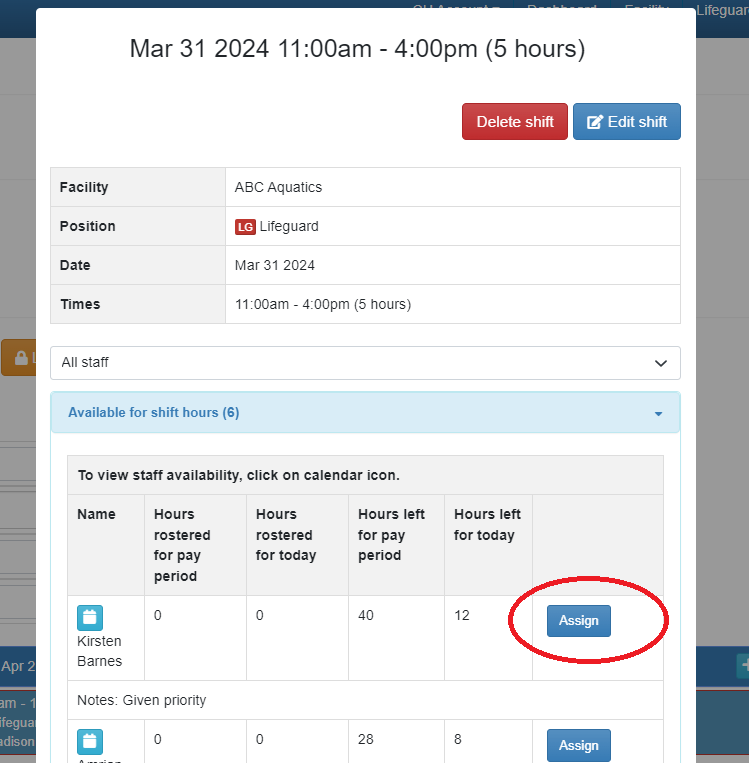
- Schedule Managers can assign individual shifts be clicking directly into a shift and assigning an available staff member.
- To save yourself some time, select the “SwiftShift” button and shifts will be auto filled based on the priority status of the employee and their availability.
Staff Availability
- Schedule managers or individual employees can update their availability by going to Schedule > Availability
- Select the addition button for the date you wish to add availability. Staff members will only be able to add availability for themselves. Schedule Managers can search staff members and add availability.
- Pro Tip: Availability is required for a staff member to be assigned a shift.
- Locking Availability
- Nothing is more frustrating than working on a schedule, just to have staff changing their availability as you are working on it. HydroApps provides a Lock Availabilities feature so you can complete the schedule without staff submitting additional changes.
- Schedule Managers can lock availabilities by going to Schedule > Schedule Management > Then select orange “Lock Availabilities” button.

Leave Requests
- Staff members can submit leave requests by visiting Schedule > Leave Requests and then selecting “+ Add Leave Request”
- Schedule Managers can search staff members and add leave requests on behalf of staff.
- Schedule Managers can also approve and decline requests.
Publishing a Schedule
- When your schedule is complete, select the green “Publish Schedule” button. This makes your schedule visible to staff members.
Managing Shift Changes
Sub Requests
- Staff members can click on assigned shifts and request a sub.
- Their shift will appear orange indicating it has been posted.
- Other staff members can see shifts available for pick up by selecting the Open Sub Requests button on their dashboard.
- Users will be able to see the status of sub requests by visiting Schedule > Sub Requests.
- Schedule Managers can view pending shift changes under Schedule > Pending Shift Changes
- Pro Tip: Schedule Managers can choose their sub request approval settings by selecting the “Settings” button under “Pending Shift Changes”

 Editing Shifts
 Editing Shifts
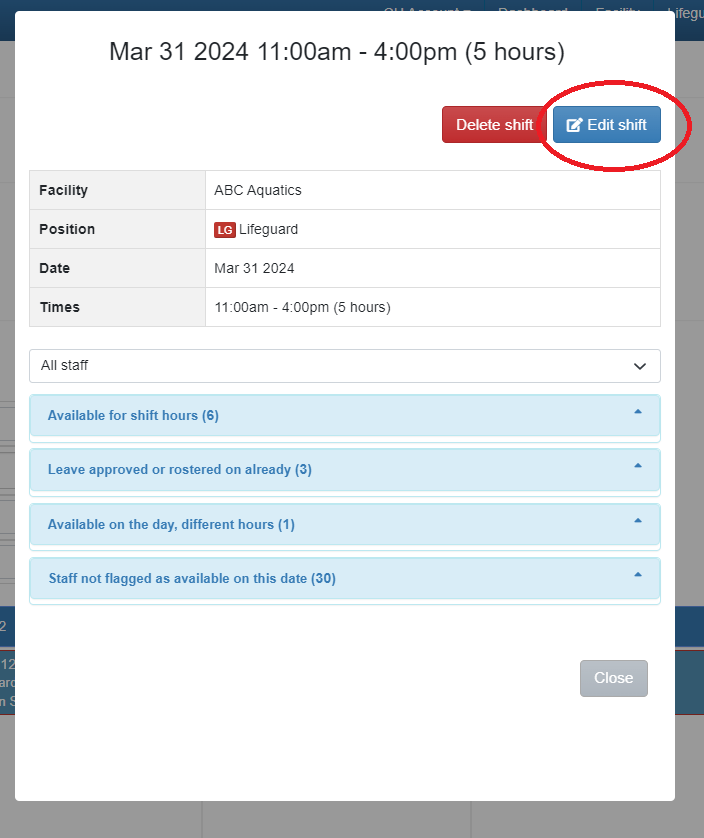
- Schedule Managers can edit open shifts by clicking on the shift and hitting “edit shift.”
- Assigned shifts must be unassigned before being edited on published schedules.
Announcements
- Staff announcements allow you to communicate messages to staff members through their Schedule Manager dashboard.
- Select Schedule > Announcements > New Announcement
- You can filter who sees your message based off facility, position, or even specific staff members.
Schedule Reports
Schedule Manager has a variety of reports. To access Schedule Manager reporting, select Reports > Schedule
- You will want to check out a couple of key features:
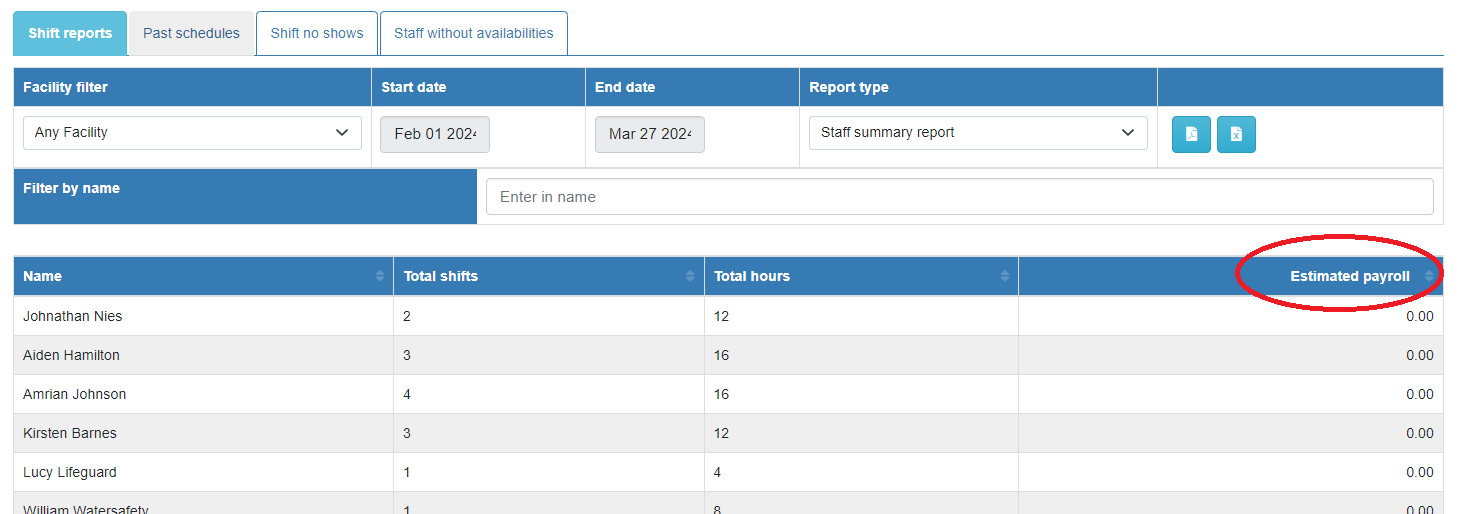
- Under the shift reports tab you have a few different “report types” to choose from. The staff summary report let’s you view the total hours an employee works for a specified date range.
- Pro Tip: You can see estimated payroll information dependent on the report type you select. To pull this information, you must enter employee pay rates in their user profile (Admin > Client Management > User Listing > Select edit button of user > Enter pay rate under Schedule Management.
- Under the shift reports tab you have a few different “report types” to choose from. The staff summary report let’s you view the total hours an employee works for a specified date range.
-
- Keep track of Shift No Shows and late arrivals by visiting the “Shift No Shows” tab. This report helps you keep track of repeat offenders so that you can take appropriate next steps.
The Schedule Manager module is designed to meet the unique demands of your operations and provide schedule visibility in real time to reduce errors, minimize missed shifts, and increase overall employee (and manager) satisfaction. Still have questions? No problem, reach out to our team at [email protected] and we will get you taken care of!
Looking for more help? Check out the HydroApps Help Center step-by-step videos on the full suite of HydroApps products!
Interested in learning more about Schedule Manager? View our full product description here,